Zoom Links#
The Zoom Links for your remotely proctored exams and quizzes will be posted by you and accessed by your students directly through your UBLearns course. The Zoom Meetings for your midterm exams will be scheduled by the department once the add/drop period for the session has ended. You will receive the Zoom Meeting links, ids, and passwords in an email.
Once your receive the Zoom proctoring information you will need to:
Create Groups in your UBLearns course.
Move Students between the newly created groups.
Import the Zoom Link Pages into your UBLearns course.
Edit the Zoom Link Pages to include the zoom info for each proctoring session.
Adjust the Availability Settings for each page based on group enrollment.
1. Create UBLearns Groups#
Using the group feature on UB Learns will give you control over which students are assigned to each Zoom proctoring session. This way as an instructor, you know where students are supposed to be during the exam.
How Many Groups?
First calculate how many groups you will need. This number depends on how many students are in your class. We want a maximum of 24 students assigned to each Zoom Proctoring Session.
0-24 students: 0 groups are needed (you can skip creating groups)
25-48 students: 2 groups are needed
49-72 students: 3 groups are needed
Access the Groups Tool
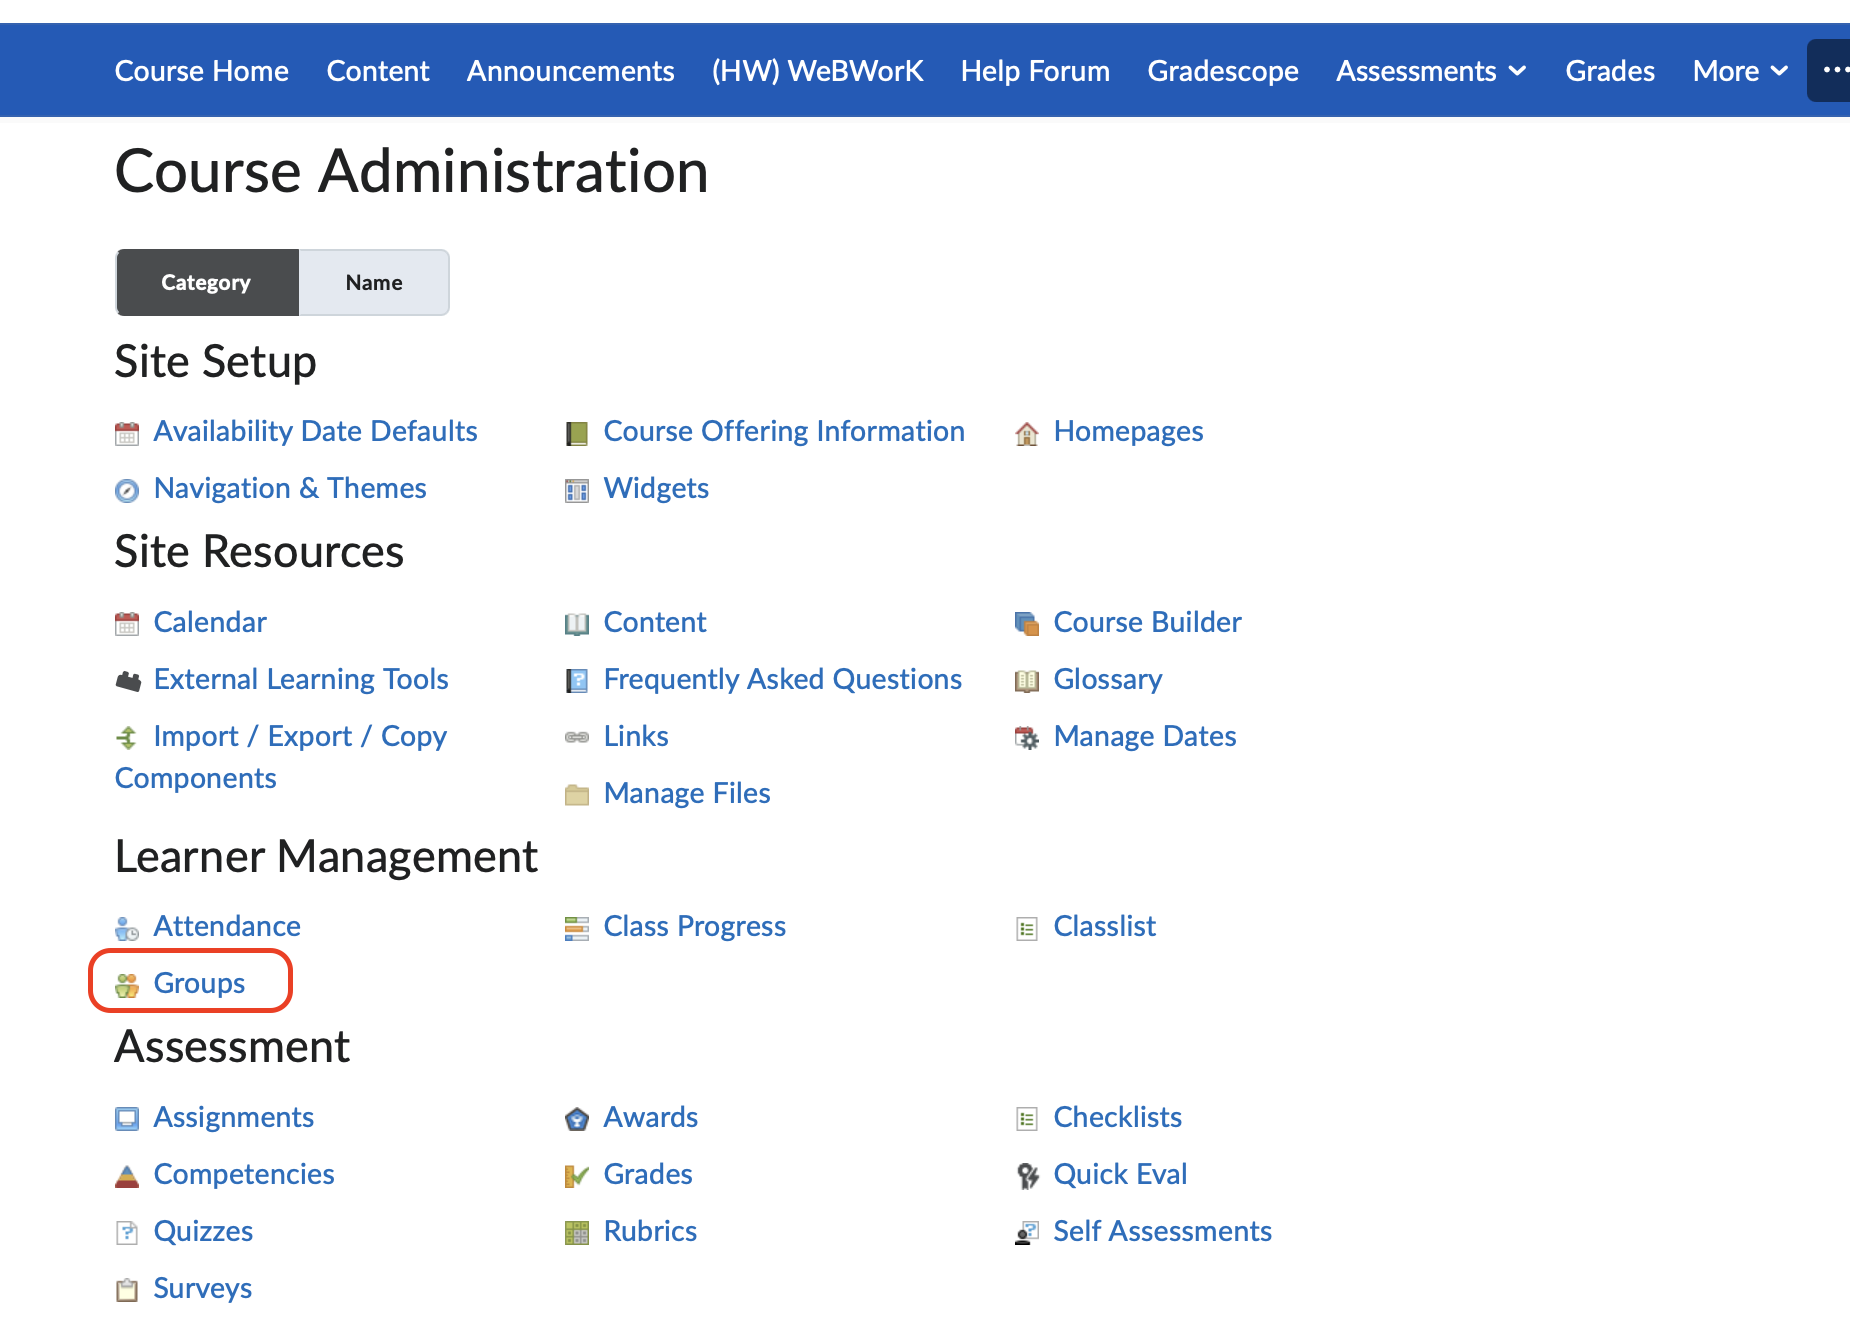
In your UB Learns course navbar, click: More > Instructor Only > Course Admin.
Under Learning Management, select “Groups”.
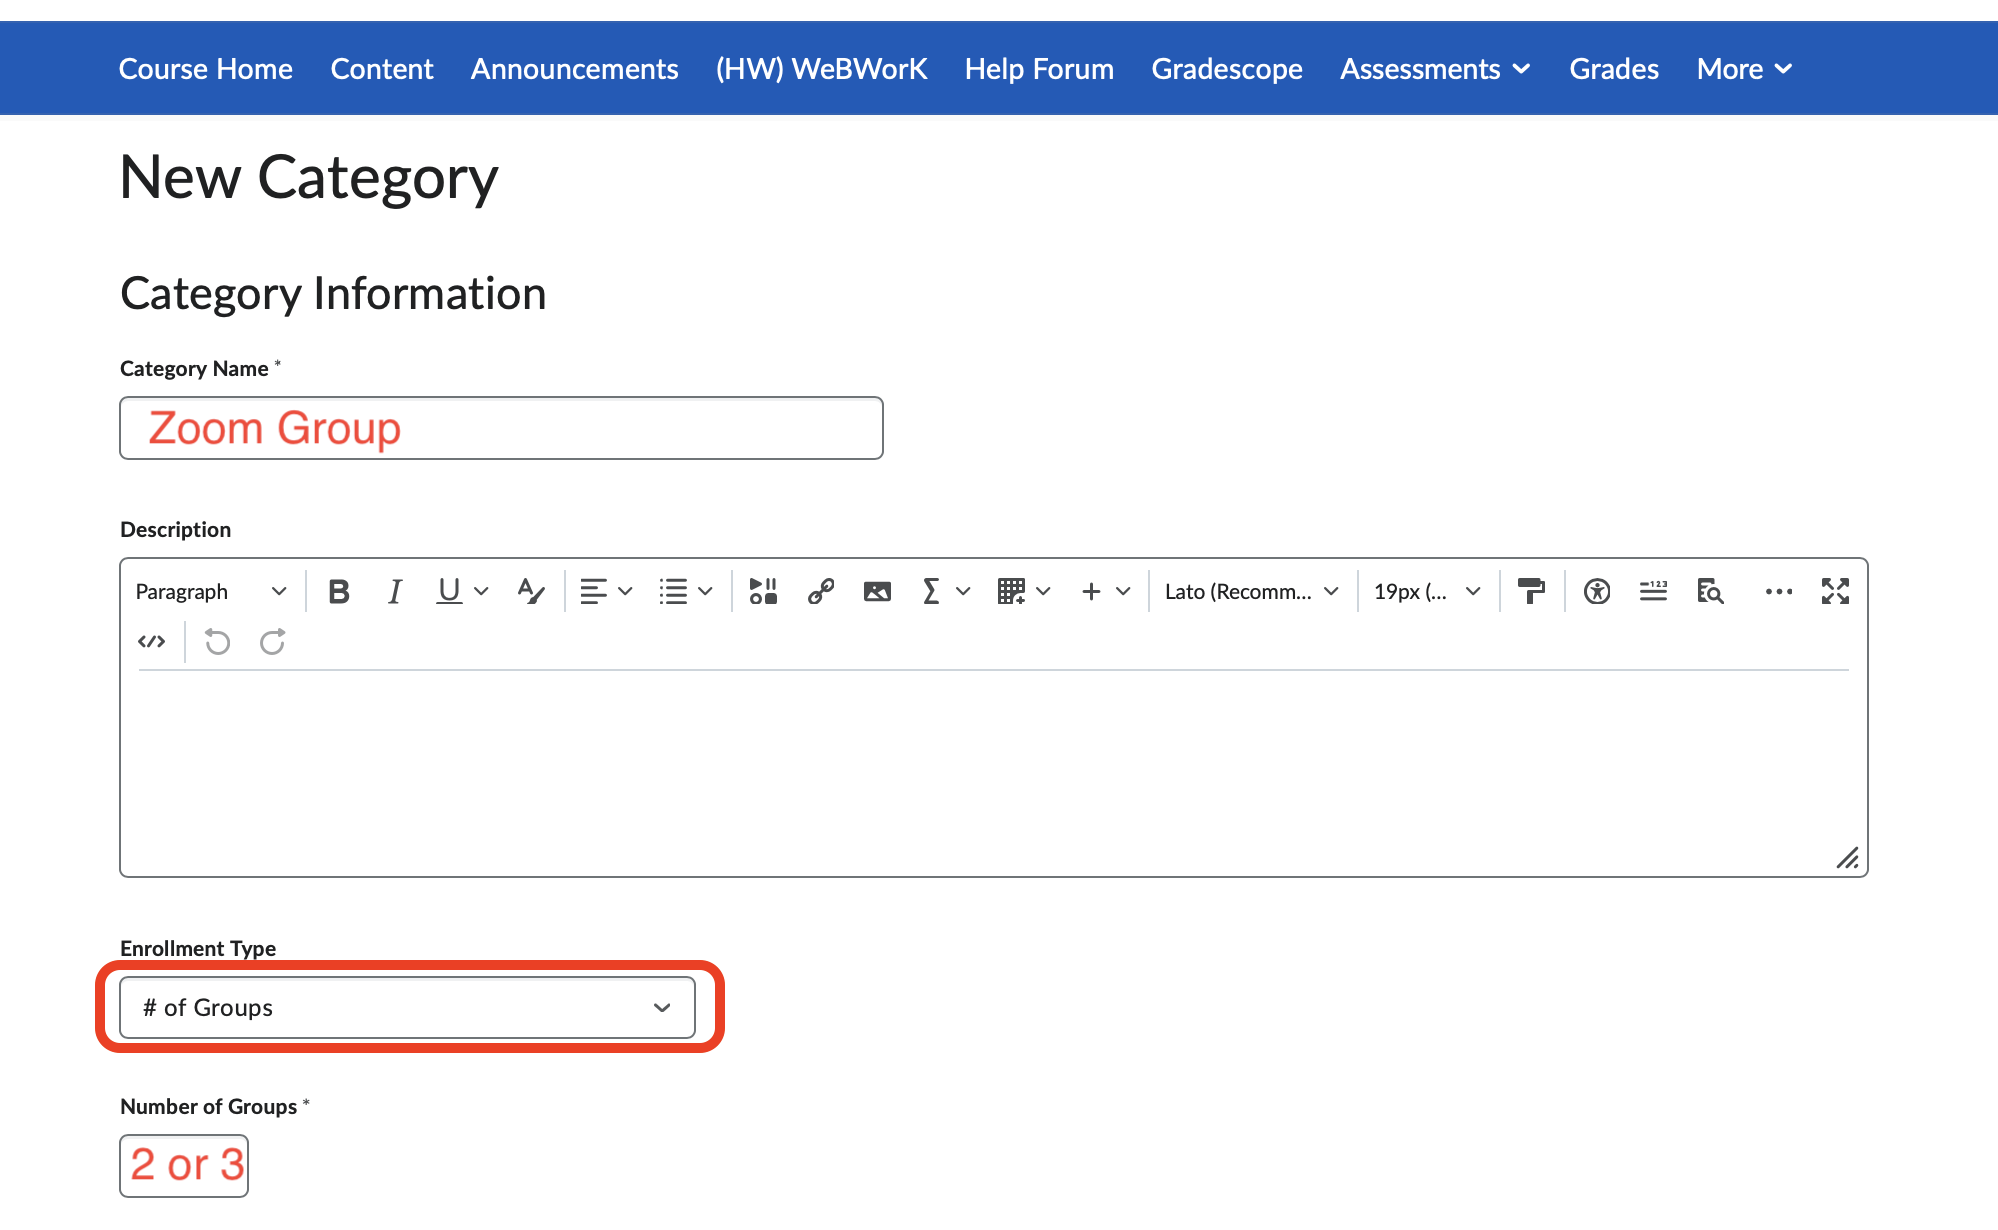
Create a New Group Category
Click the “New Category” button.
Enter a Category Name (e.g., “Zoom Group”).
Set Enrollment Type to: # of Groups
Enter the Number of Groups needed: 2, 3 (whatever you calculated in step 0)
Set Restrict Enrollments To: No Restrictions
Additional Settings
Enter the Group Prefix to be Zoom
Check both of the boxes:
Auto-enroll new users.
Randomize users in groups.
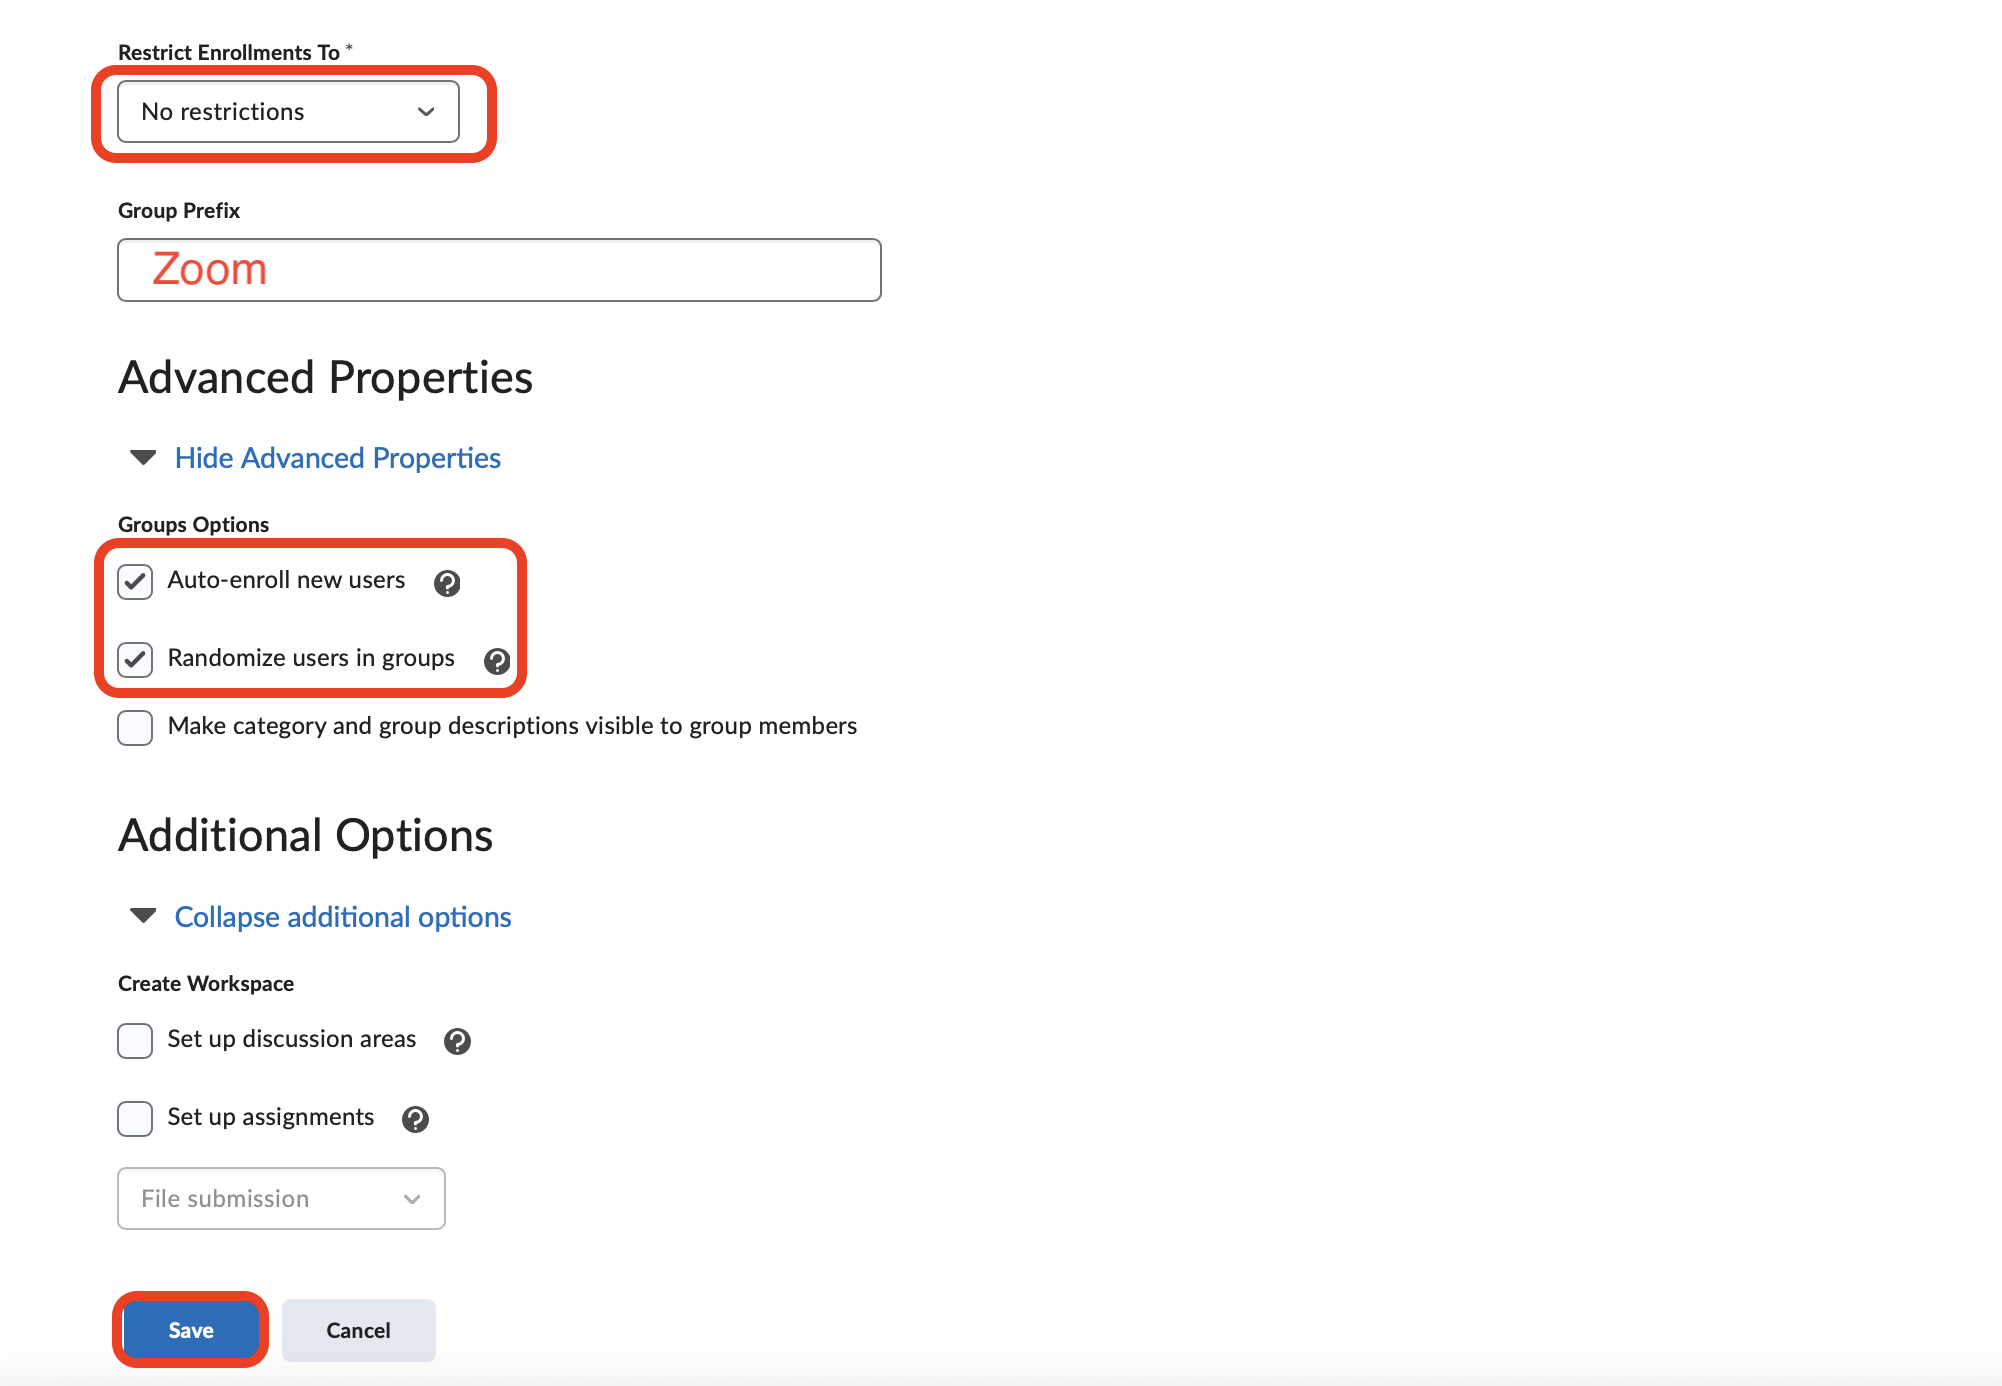
Save and Review
Click “Save”.
Brightspace will generate the groups based on your settings.
You can click on the group category to view and manage group membership. This way you will be able to see which group each student has been assigned to and therefore know which exam proctoring session they are in.
2. Moving Students Between Groups#
You do have the ability to move students from one group to another. Why would you want to do this?
AR Students: If you are going to proctor a student that has Accommodations through the AR Office, you will need to move them into the Zoom Group you as the instructor will be proctoring.
Suspicious Students: If a student has previously engaged in academic dishonesty, or has been non-compliant with their workstation set up or camera placement, you may want to move them into your own Zoom Group so that you are better able to monitor them directly.
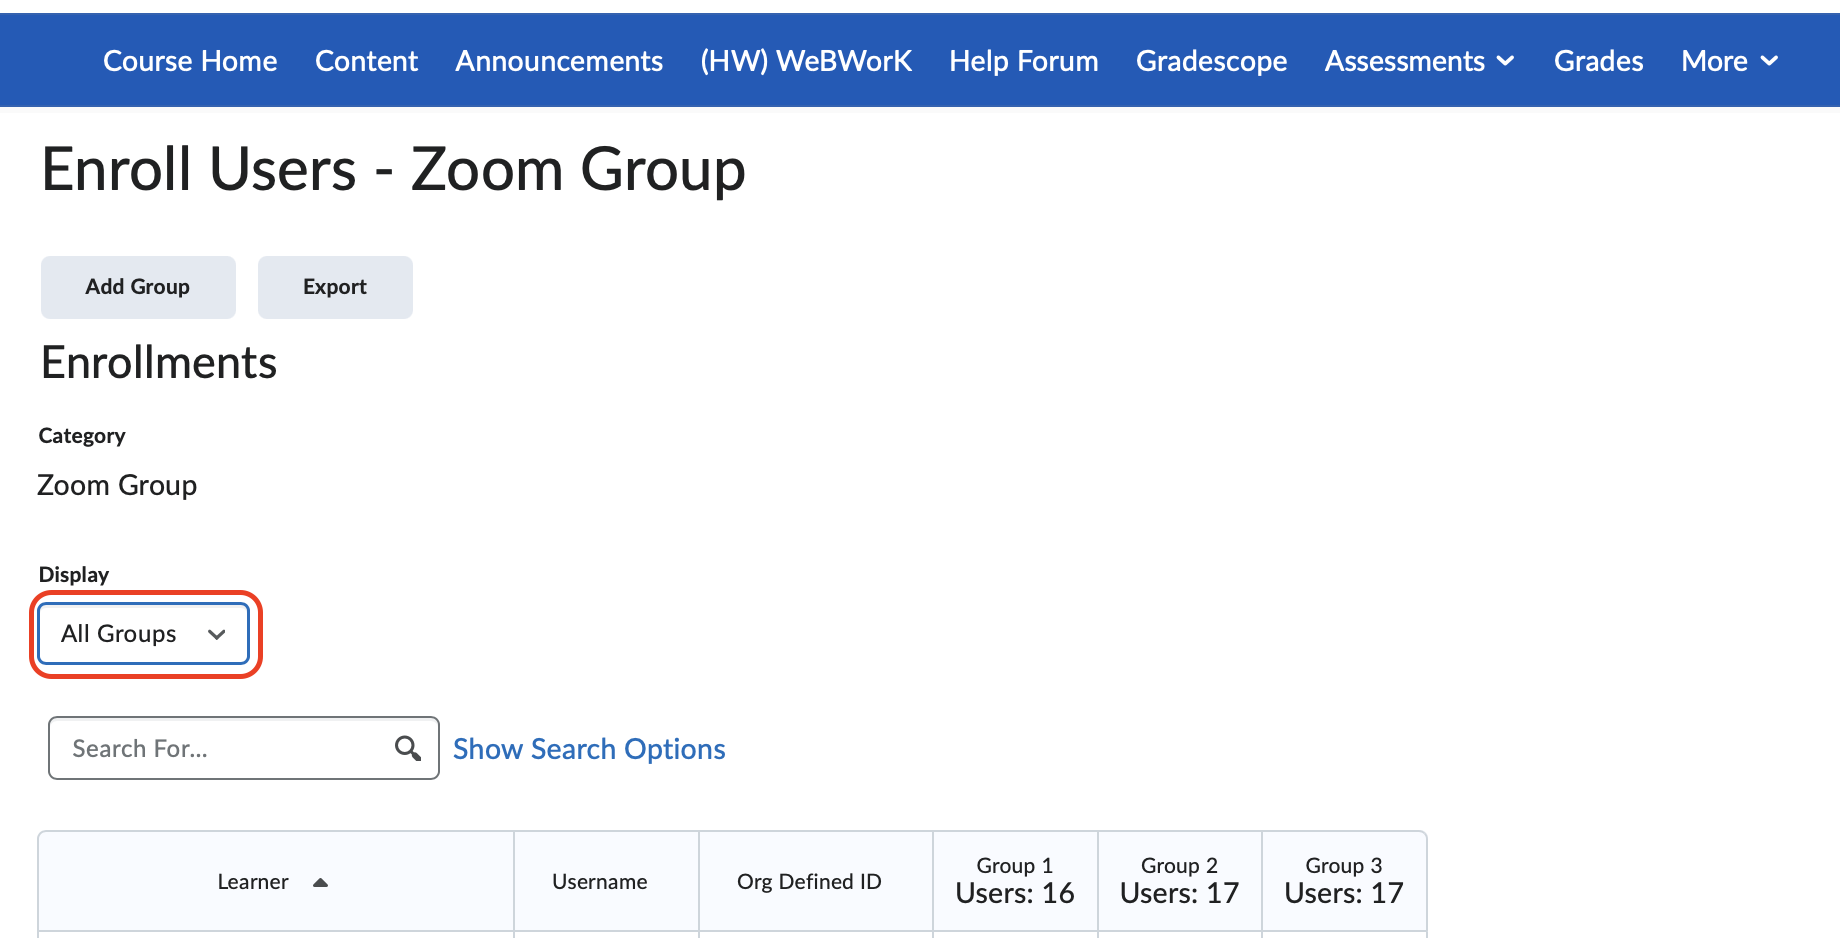
Click on the dropdown icon next to the Zoom Group name.
Click “Enroll Users”.
Under Display select All Groups. This will give a list of all your students. Adjust their group assignment as desired, making sure you don’t assign a student to more than one group.
Click “Save”.
3. Import the Zoom Link Pages#
This is the Brightspace Package that you can import into UBLearns. It will create three pages in your course: Zoom Meeting Links - Group 1, Group 2, and Group 3.
Zoom Link Pages - Brightspace Package
See the instructions on the UBLearns package page for how to import.
4. Edit the Zoom Link Pages#
Once the three pages are imported, you need to make a few adjustments:
How many pages should you keep? - The number of pages should equal the number of groups you created. Delete any extra pages.
If you didn’t need to create any groups, then only keep one of the pages.
Quiz Zoom Meeting Info - Copy and paste your Quiz Zoom meeting information into the appropriate spot on each page. This is most likely your regular Zoom Meeting information and should be the same for each page.
Midterm Exam Zoom Meeting Info - Copy and paste the Zoom Information you received for each of your midterm exam proctoring sessions. This info should be different for each page and each midterm exam.
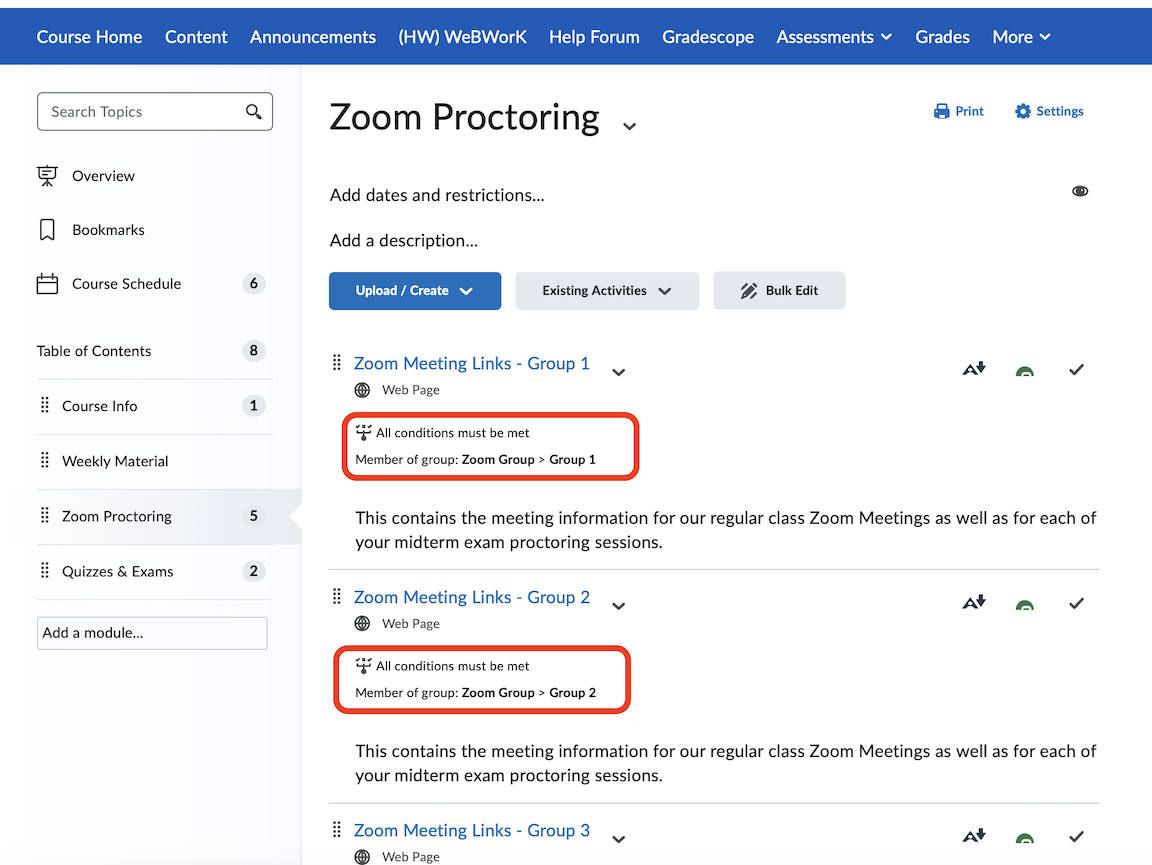
5. Adjust Availability Settings#
At this point students will be able to access all of the Zoom link pages on UB Learns. We now need to set it so only the applicable group has access to the relevant page. For example: only Zoom Group 1 has access to the Zoom Meeting 1 page on UB Learns.
Select the dropdown menu icon next to the page you want to edit.
Select Edit Properties in Place
Click on Add dates and restrictions
Under Release Conditions, click Create
Under Condition Type, select Group Enrollment
Select the appropriate group: either Zoom 1, Zoom 2, or Zoom 3.